
START YOUR FASHION JOURNEY HERE
When it comes to makeup, the eyes have a captivating allure that can’t be denied. They are often considered the focal point of one’s face, and mastering different types of eye makeup techniques can enhance their beauty manifold. Whether you’re aiming for a subtle, everyday look or a dramatic, evening glam, understanding various eye makeup techniques is crucial. In this comprehensive guide, we’ll delve into the diverse array of eye makeup techniques that can help you elevate your eye game to new heights.
Essential Tools for Eye Makeup
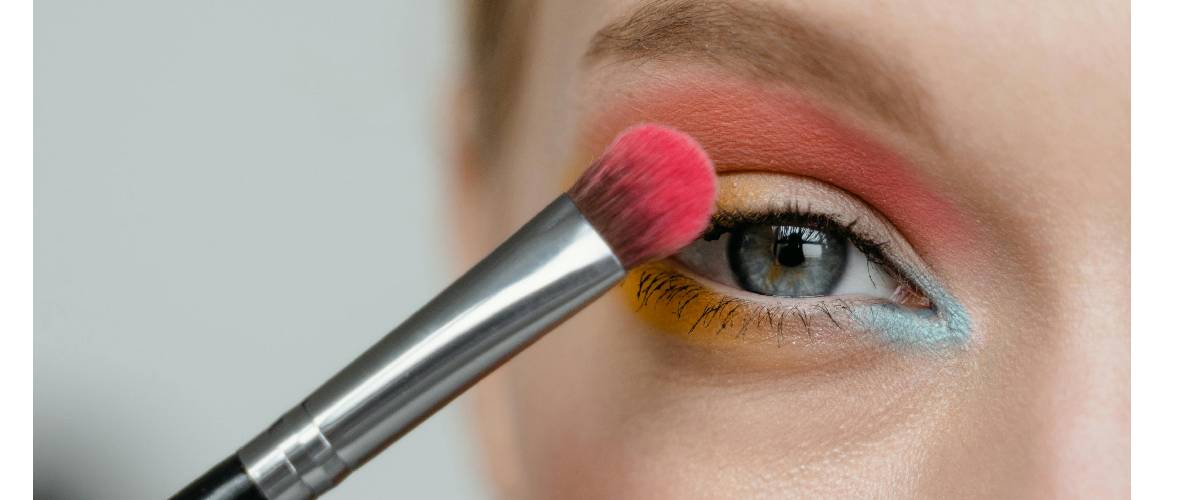
When it comes to mastering eye makeup, having the right tools is essential for achieving flawless looks. Among the indispensable tools are high-quality brushes. A set of brushes designed specifically for eye makeup can make all the difference in precision and blending. Look for brushes with varying sizes and shapes to accommodate different types of eye makeup techniques, such as blending brushes for seamless transitions and angled brushes for precise application along the lash line. Additionally, investing in a reliable eyelash curler can instantly lift and enhance the lashes, creating a more open-eyed appearance.
Another must-have tool is a versatile eyeshadow palette. Opt for a palette that offers a range of shades and finishes to suit any occasion or mood. From matte neutrals for everyday looks to shimmering metallics for special occasions, having a diverse selection allows for endless creativity. Alongside eyeshadow, eyeliner is a staple for defining the eyes. Whether you prefer pencil, liquid, or gel formulas, choosing a long-lasting and smudge-proof eyeliner is key. Experiment with different Types of eye makeup techniques, such as winged liner or tightlining, to enhance the shape and intensity of the eyes. With the right tools at your disposal, mastering eye makeup becomes not only achievable but also enjoyable.
Prepping the Canvas: Eye Primer Application
Preparing the canvas for eye makeup is crucial for achieving long-lasting and vibrant looks, and applying an eye primer is the first step in this process. Eye primer creates a smooth and even base for eyeshadow application while enhancing its color payoff and preventing creasing throughout the day. To apply eye primer effectively, start by dispensing a small amount onto your fingertip or a flat concealer brush. Then, gently dab the primer onto the eyelids, focusing on areas where creasing tends to occur, such as the inner corners and the crease. Using active strokes, blend the primer outward towards the brow bone until the entire lid is evenly coated. This step not only ensures that your eyeshadow adheres better but also helps to intensify its pigmentation, allowing for more vibrant and long-lasting eye looks.
Furthermore, eye primer is essential for maximizing the longevity of your eye makeup, especially when experimenting with different Types of eye makeup techniques. Whether you’re creating a smoky eye, cut crease, or halo eye, a well-prepped base sets the stage for seamless blending and precise application. By providing a grippy surface, eye primer helps eyeshadow adhere evenly, preventing fallout and ensuring that your carefully crafted eye looks stay intact throughout the day or night. Additionally, using an eye primer with mattifying properties can help control excess oil on the lids, keeping your eyeshadow looking fresh and crease-free for hours on end. Incorporating eye primer into your makeup routine is a simple yet effective way to elevate your eye makeup game and ensure that your creations stay flawless from morning until night.
Mastering the Art of Eyeshadow Blending
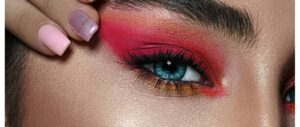
Mastering the art of eyeshadow blending is essential for achieving seamless and professional-looking eye makeup. To begin, select a fluffy blending brush specifically designed for blending eyeshadows. Start by applying a transition shade to the crease of the eye using back-and-forth windshield wiper motions. This helps to create a soft gradient and serves as a base for building depth and dimension. Next, choose a slightly darker shade and focus on applying it to the outer corner of the eye, gradually blending it into the crease using circular motions. This technique adds definition and creates a flattering shape to the eyes. Remember to blend with a light hand and gradually build up the intensity to avoid harsh lines.
Experimenting with different Types of eye makeup techniques, such as halo eyes or cut creases, requires precision blending to achieve a seamless transition between shades. For a halo eye, apply a lighter shade to the center of the lid and blend outward, then deepen the outer and inner corners with darker shades, ensuring a smooth gradient between colors. Alternatively, for a cut crease look, use a small, precise brush to carve out the crease with a concealer or eyeshadow primer before blending eyeshadows on top for a defined and polished finish. Practice makes perfect when it comes to eyeshadow blending, so don’t be afraid to experiment with different brushes, techniques, and color combinations to find what works best for you. With patience and practice, you’ll soon master the art of blending and elevate your eye makeup game to the next level.
Creating Depth with Cut Crease Technique
The cut crease technique is a powerful method for creating depth and definition in eye makeup looks. To start, apply a matte eyeshadow that is slightly darker than your skin tone to the crease of the eyelid using a small, precise brush. This serves as the transition shade and helps to define the natural crease of the eye. Next, use a concealer or eyeshadow primer to carve out a sharp line along the crease, creating a “cut” effect. This step requires precision and a steady hand to achieve a clean and crisp line. Once the crease is carved out, carefully blend the edges of the concealer or primer to seamlessly transition into the lid color.
Experimenting with different Types of eye makeup techniques, such as adding shimmer or glitter to the lid, can enhance the depth and dimension of a cut crease look. After carving out the crease, apply a metallic or glitter eyeshadow to the lid, focusing on the area below the cut crease line. This creates contrast and draws attention to the sharpness of the crease, adding drama and intensity to the eyes. Additionally, incorporating gradient shades into the crease can further enhance the depth of the cut crease look, with darker shades at the outer corner fading into lighter shades towards the inner corner. With practice and patience, mastering the cut crease technique allows for endless creativity and the ability to transform any eye makeup look into a work of art.
Elevating Your Look with Winged Eyeliner
Winged eyeliner is a classic eye makeup technique that can instantly elevate your look with its timeless elegance and sophistication. To achieve the perfect wing, start by drawing a thin line along the upper lash line using a liquid or gel eyeliner. Using short, controlled strokes, gradually build up the intensity and thickness of the line until you reach your desired shape and length. Next, create the wing by extending the eyeliner upwards and outwards from the outer corner of the eye, following the natural curve of the lower lash line as a guide. This step requires precision and a steady hand to ensure symmetry between both eyes.
Experimenting with different Types of eye makeup techniques, such as adjusting the angle and length of the wing, allows for customization to suit your eye shape and personal style. For a subtle and natural look, create a small and delicate wing that follows the natural curve of the eye. Alternatively, for a bold and dramatic effect, extend the wing further outwards and upwards, creating a more exaggerated shape. Additionally, incorporating different eyeliner finishes, such as matte or metallic, can further enhance the overall look and add dimension to the eyes. With practice and experimentation, mastering the winged eyeliner technique allows for endless possibilities to express your creativity and elevate your eye makeup game to new heights.
Enhancing Lashes with Mascara Application
Enhancing lashes with mascara application is a fundamental step in perfecting your eye makeup routine, as it adds volume, length, and definition to your lashes, framing your eyes beautifully. Start by selecting the right mascara formula for your desired effect, whether you prefer volumizing, lengthening, or curling. Then, begin by gently wiggling the mascara wand at the base of your lashes, ensuring each lash is thoroughly coated. Use a zigzag motion as you sweep the wand upwards to separate and lift the lashes for maximum impact. For a more intense look, layering mascara is a valuable technique; start with a lengthening formula to elongate the lashes, followed by a volumizing mascara to add fullness and drama.
Experimenting with different types of eye makeup techniques can further enhance the effect of mascara application. For instance, using an eyelash curler before applying mascara can create a more lifted and wide-eyed appearance. Additionally, employing a mascara primer can boost the performance of your mascara, providing extra volume and length for a more dramatic result. Waterproof mascara is another option, ideal for long-lasting wear, especially in humid or rainy conditions. Whether you’re aiming for a natural look or dramatic effect, mastering mascara application techniques empowers you to accentuate your lashes and elevate your overall eye makeup effortlessly.
Brightening the Eyes with Inner Corner Highlight
Brightening the eyes with inner corner highlight is a simple yet effective technique to add a touch of radiance and dimension to your eye makeup look. To start, choose a highlighter shade that complements your skin tone and desired makeup style. Using a small, precise brush or your fingertip, apply the highlighter to the inner corner of the eye, where the tear duct meets the bridge of the nose. Gently blend the highlighter outward towards the center of the eyelid to create a subtle gradient effect. This technique instantly brightens the eyes, making them appear more awake and refreshed.
Experimenting with different types of eye makeup techniques, such as layering different shades or textures of highlighter, can enhance the overall effect of inner corner highlighting. For a soft and natural look, opt for a light, iridescent shade that adds a subtle sheen to the inner corner. Alternatively, for a more dramatic effect, choose a metallic or shimmering highlighter that catches the light and creates a luminous glow. Additionally, incorporating a matte or satin highlighter into the brow bone area can further accentuate the eyes and add definition to the eye makeup look. With this simple yet versatile technique, you can effortlessly brighten and enhance your eyes, completing your makeup look with a touch of luminosity.
Framing the Eyes: Perfecting Eyebrow Techniques
Framing the eyes with perfectly groomed eyebrows is essential for achieving a polished and balanced eye makeup look. To start, determine the shape and arch that best complements your facial features. Using a spoolie brush, comb the eyebrows upward to reveal their natural shape, then use small, precise strokes to fill in any sparse areas with an eyebrow pencil or pomade. Pay attention to the natural arch of your brows and avoid over-plucking or over-filling to maintain a natural appearance. Next, use a concealer or brow gel to define and clean up the edges, creating crisp lines and ensuring a neat and polished finish.
Experimenting with different types of eye makeup techniques, such as ombre brows or feathered brows, allows for customization to suit your personal style and preference. Ombre brows involve using a lighter shade at the front of the brow and gradually transitioning to a darker shade towards the tail, creating a soft and gradient effect. Feathered brows, on the other hand, involve brushing the brow hairs upwards and outwards to create a textured and natural-looking finish. Additionally, incorporating brow styling products, such as brow gel or wax, can help to set the brows in place and add definition for a more sculpted look. With the right techniques and products, mastering eyebrow grooming allows you to frame your eyes beautifully and enhance your overall eye makeup look effortlessly.
Sealing the Deal: Setting Spray for Longevity
Sealing the deal with setting spray is a crucial step in any makeup routine, especially when aiming for long-lasting wear. Setting spray helps to lock in your makeup, including your eye makeup, ensuring that it stays fresh and vibrant throughout the day or night. To apply setting spray effectively, hold the bottle about 6-8 inches away from your face and spritz evenly in a T and X motion. Be sure to close your eyes and mouth while spraying to avoid any irritation. This technique ensures that your entire face, including your eye makeup, is covered with a fine mist of setting spray, providing a protective barrier against smudging, fading, and transferring.
Experimenting with different types of eye makeup techniques, such as using setting spray to intensify eyeshadow pigmentation or foil metallic shadows, can further enhance the overall longevity and impact of your eye makeup. Before applying eyeshadow, lightly mist your eyeshadow brush with setting spray to dampen it, then dip it into your desired eyeshadow shade. This technique helps to intensify the color payoff and create a more vibrant and long-lasting result. Additionally, using setting spray to foil metallic eyeshadows or loose pigments can enhance their metallic sheen and prevent fallout throughout the day. With the right setting spray and application technique, you can seal the deal on your makeup look, ensuring that your eye makeup stays flawless and vibrant from morning until night.